
CopyFrom: Author:Alex Y DateTime:2015-01-27 Hits:0
Hair pieces such as silk base lace closures are popular cosmetic accessories.you may make silk base closure to save some money by making your own .They're also a low cost alternative to hair restoration, especially after certain therapies and baldness. Silk top lace closures are 4-inch by 4-inch pieces that are added to the crown of your head as part of the braid hair weave process. It consists of a layer of lace, and silk fabric with knots that are concealed below between the silk layers, it is invisible knots thereby create an illusion that the hair is actually growing from your scalp. Silk top lace closures are readily available in a variety of textures and colors that suit your style. you may be able to save some money by making your own silk base closure.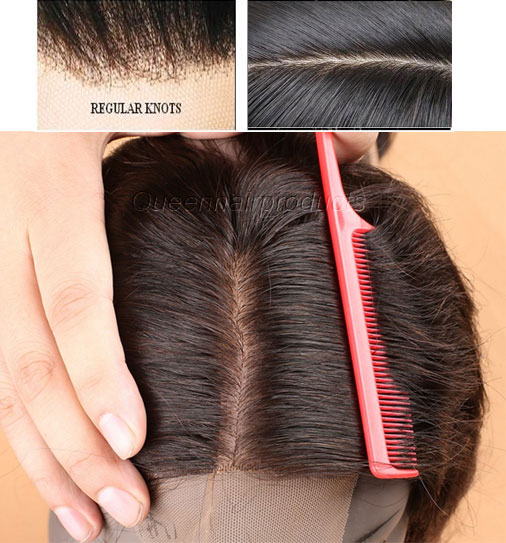
Things needed:
4-by-4 size silk base hair closure, 16 to 18 inches long.
2 hair pins or clips.
2 curved threading needles.
Steps:
1.Braid your hair into vertical cornrows. Place a 4-by-4 size silk-base closure at the top center of your (or your client's) head in the spot where you want to attach it. Mark this space by creating two horizontal braids that run from the center front of your scalp to the back, spaced two or three inches apart and four inches long.
2.Place the silk base lace closure on top of the horizontal braids. Hold the silk base closure against your head with two hair pins, one at the front and one at the back of the lace closure piece.
3.Insert two curved threading needles into the braided hair beneath the front of the base closure. Thread natural or synthetic hair through the needles' eye.
4.Thread a lock stitch into the right front side of the silk base closure, attaching it to your head. Create a lock stitch by sliding the needle through the silk base so that you create a loop with the hair, slide the needle back through the loop to lock the loop into place. Repeat twice, then switch to the left side of the lace closure. Sew three lock stitches with the curved threading needle on the left side of the lace closure. Move back to the right side and repeat the process. Continue stitching, three lock stitches at a time, alternating side to side until the hair closure is attached completely.
5.Unbraid your hair or sew in hair extensions, as desired, to the rest of the head so that the hair extensions blend in naturally with the lace closure, creating a seamless natural look.


 Copyright © 2014 www.toplaceclosures.com All Rights Reserved.


